
How to Plan C9 LED String Lights for a Roofline or Porch
Store Team ·
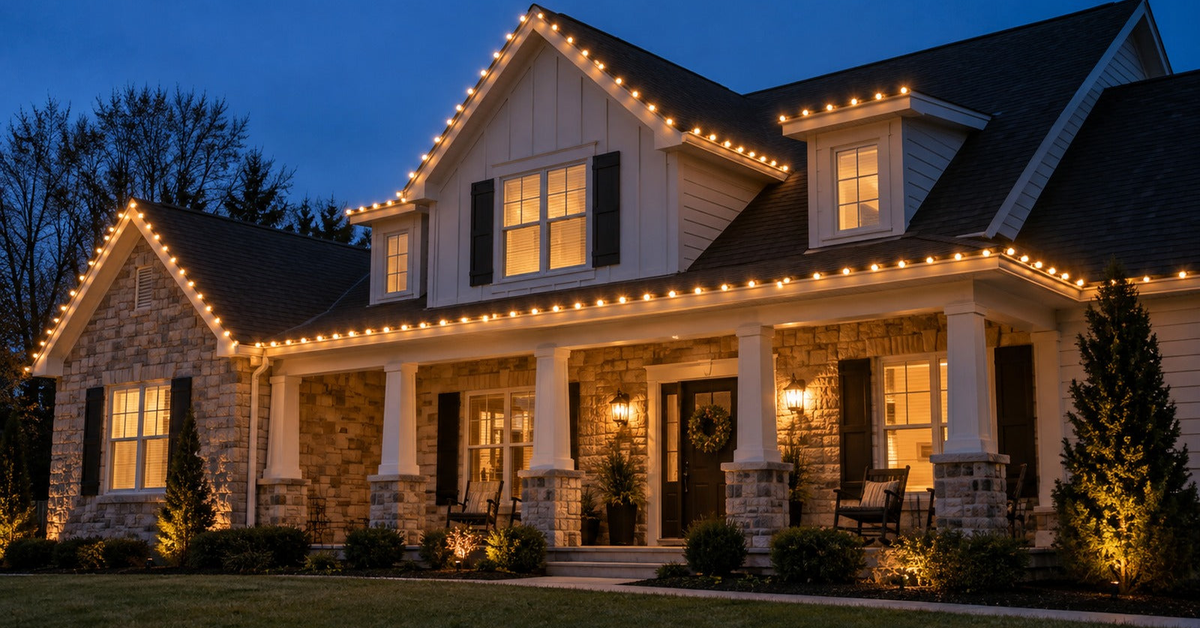
C9 bulbs create a clear architectural outline, making them a natural choice for rooflines, porch edges, and long fence runs. Planning the measured route, support points, and power position before installation helps keep the finished line straight and the connections accessible.
Measure the roofline in sections
- Measure each eave, porch edge, and gable separately.
- Add the distance around corners and down to the power source.
- Mark where the first bulb will begin and where the final bulb should end.
- Compare the total with the selected strand’s lighted and overall lengths.
- Check the current connection limit before planning multiple strands.
Choose the appropriate length and color
The ISEEBIZ C9 LED Christmas string lights currently include selected 81FT and 114FT options in warm white or multicolor, plus selected multipacks. Check the exact variant in the cart because length, color, bulb count, and pack size can change together.
Plan power and controller access
Locate the outlet before choosing the starting point. Keep the adapter and controller positioned according to the product instructions, and avoid routing cords through doors, across walkways, or where gutters and downspouts can direct water toward a connection.
Select clips for the surface
Use removable clips designed for the gutter, shingle edge, fascia, railing, or other mounting surface. The clip should hold the socket or wire without piercing, crushing, or sharply bending it. Space supports consistently so the strand does not sag.
Test the strand on the ground
- Inspect bulbs, sockets, wire, plug, and controller.
- Test the remote and all eight listed modes.
- Check the timer and brightness settings.
- Confirm the selected color and strand length.
- Replace or stop using damaged components before installation.
Install one section at a time
Start at the planned power end and work toward the final corner. Keep bulb orientation consistent and leave gentle slack at direction changes. Step back after each section to check spacing before moving higher or farther along the roofline.
Handle corners and gables cleanly
Do not force a socket directly onto a sharp corner. Use the wire section between bulbs to make a smooth turn and add a support point on both sides. For a gable, work toward the peak with even spacing, then continue down the opposite side.
Set the timer after installation
Choose the preferred mode and brightness, then begin the timer at the intended daily start time. Observe one full on-and-off cycle. Recheck the setting after a power interruption or any controller change.
Outdoor maintenance
- Inspect clips and wire after wind or severe weather.
- Keep every component in the location allowed by its instructions.
- Disconnect power before adjusting a bulb, clip, or connection.
- Remove the strand if the wire or socket is damaged.
Frequently asked questions
Can C9 lights be attached with staples?
Do not place staples or nails through the wire. Use clips designed for the surface and light construction.
How do I keep the line straight?
Measure clip spacing, install one section at a time, and check the line from the ground before continuing.
Can I connect several strands?
Follow the current connection limit for the exact selected variant. Do not combine incompatible strings, power supplies, or connectors.
For battery and cluster alternatives, see the three-style Christmas string lights comparison.